This post explains how to reduce colors in Aseprite.
Introduction
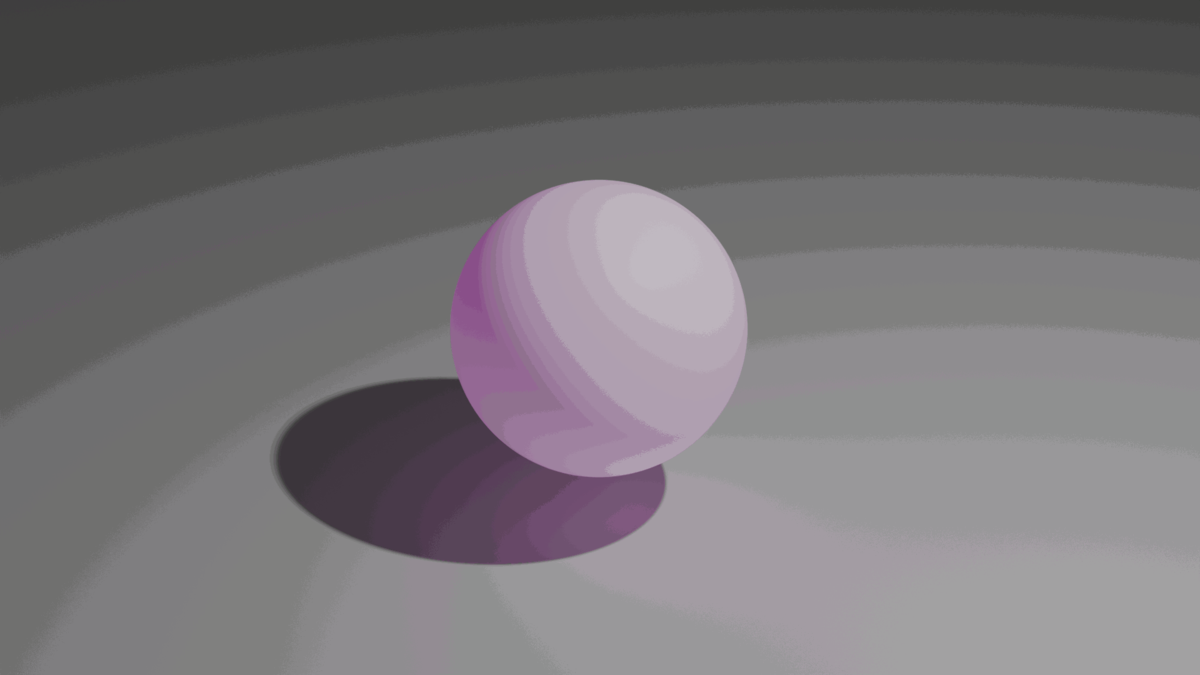
In Aseprite, we will cover how to reduce a smooth image like the one below:

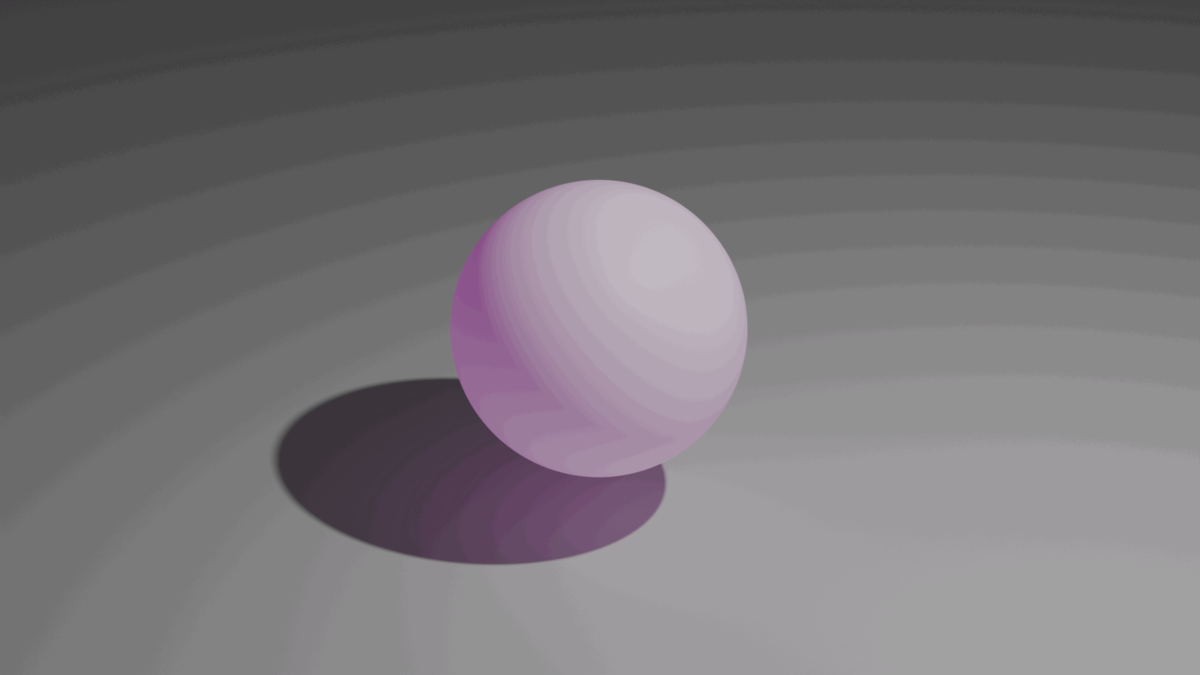
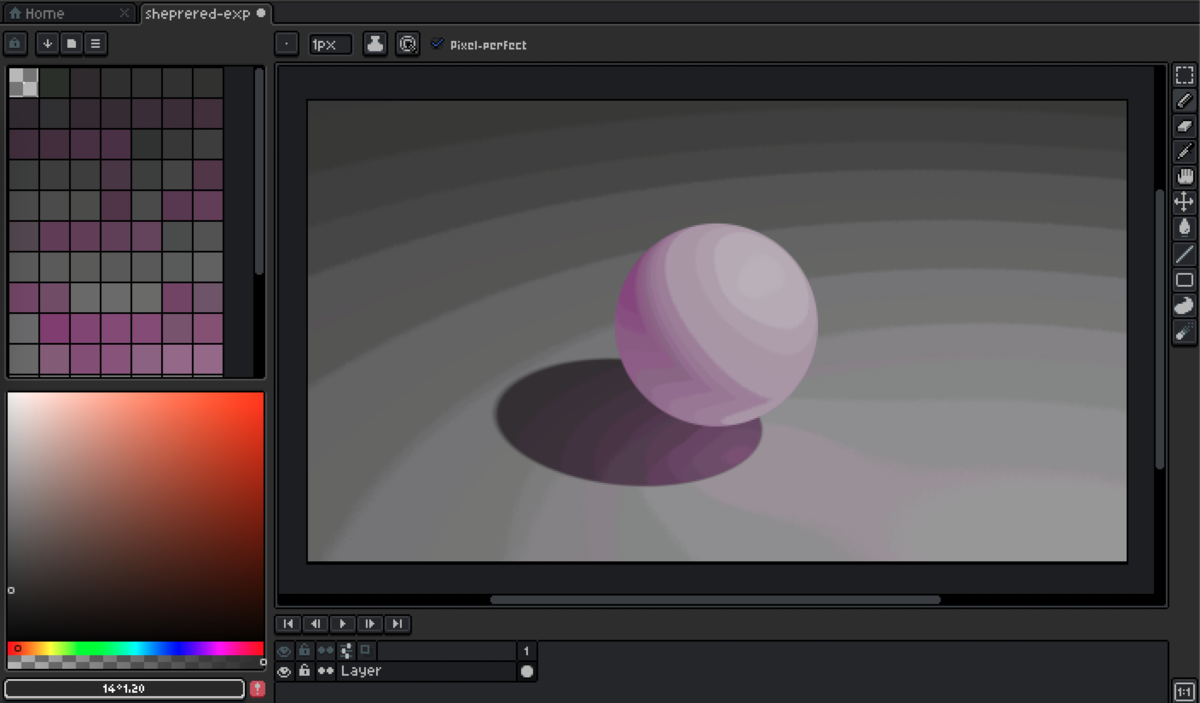
to a reduced-color image like this:
Note: This article was translated from my original post.
How to Reduce Colors in Aseprite
Follow these steps to reduce colors:
- Change the "Color Mode" to "Indexed"
- Create a new palette with the number of colors you want
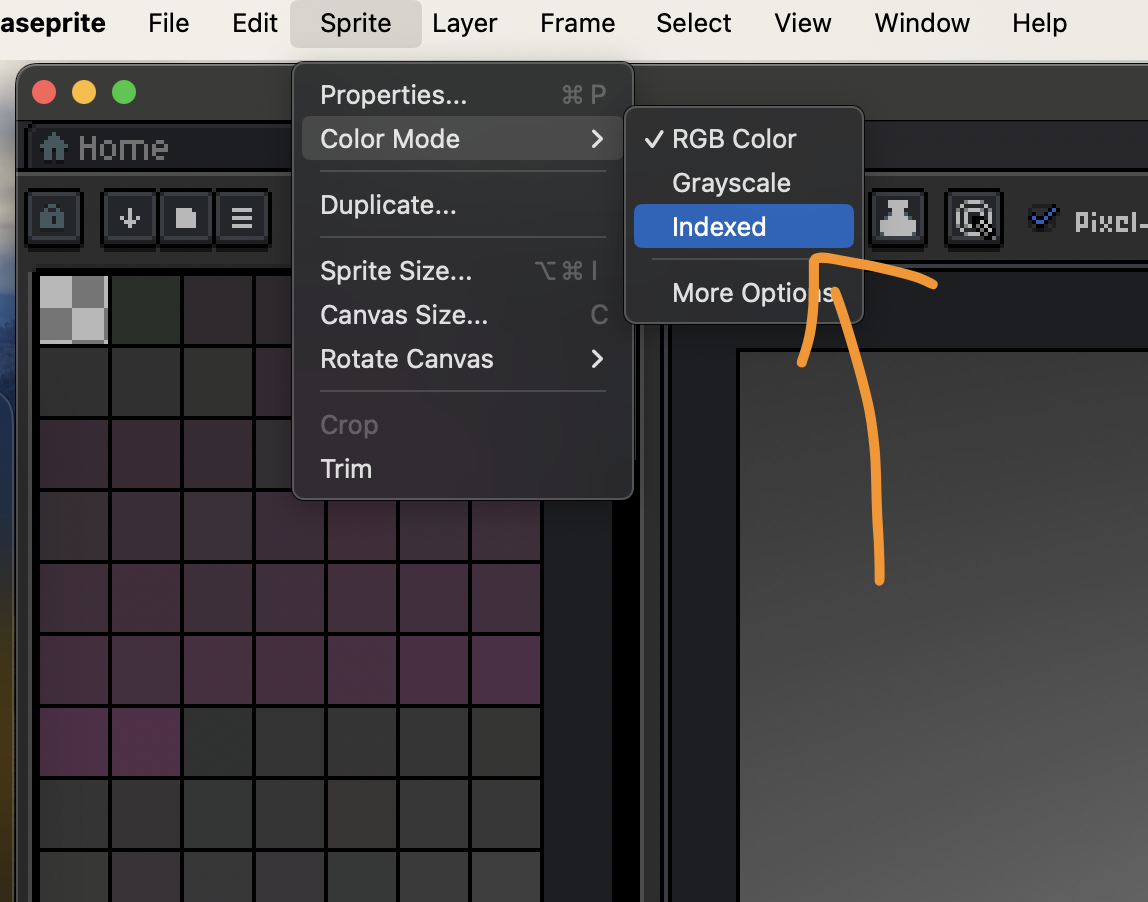
1. Change the "Color Mode" to "Indexed"
From the top menu in Aseprite, select
"Sprite" > "Color Mode" > "Indexed"
to switch to Indexed Color Mode.
When you change the Color Mode to Indexed, the number of colors is automatically reduced to 256.
Indexed Color Mode manages each color in the palette by an index number. This means that if you later change a color in the palette, all areas painted with that color will also change.
Since the maximum number of colors in Indexed mode is 256, switching to Indexed mode automatically reduces the number of colors to 256.
If you don't want this behavior, you can switch back to RGB Color mode after finishing all of the color reduction process.
Go to
"Sprite" > "Color Mode" > "RGB Color"
to change back to RGB Color mode.
2. Create a New Palette with the Number of Colors You Want
After switching to Indexed Color Mode, create a new palette and specify the number of colors.
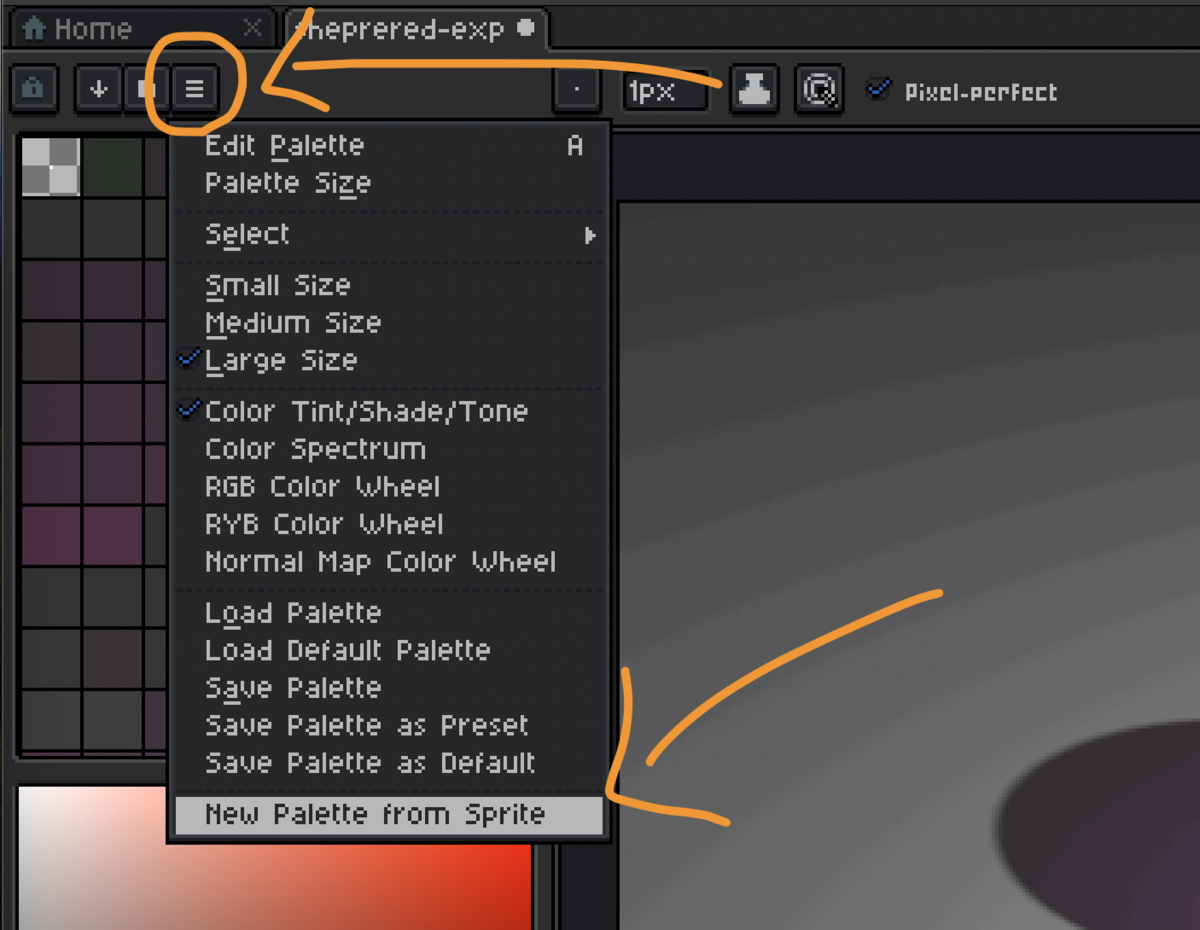
To create a new palette, click the hamburger menu on the palette and select "New Palette from Sprite".
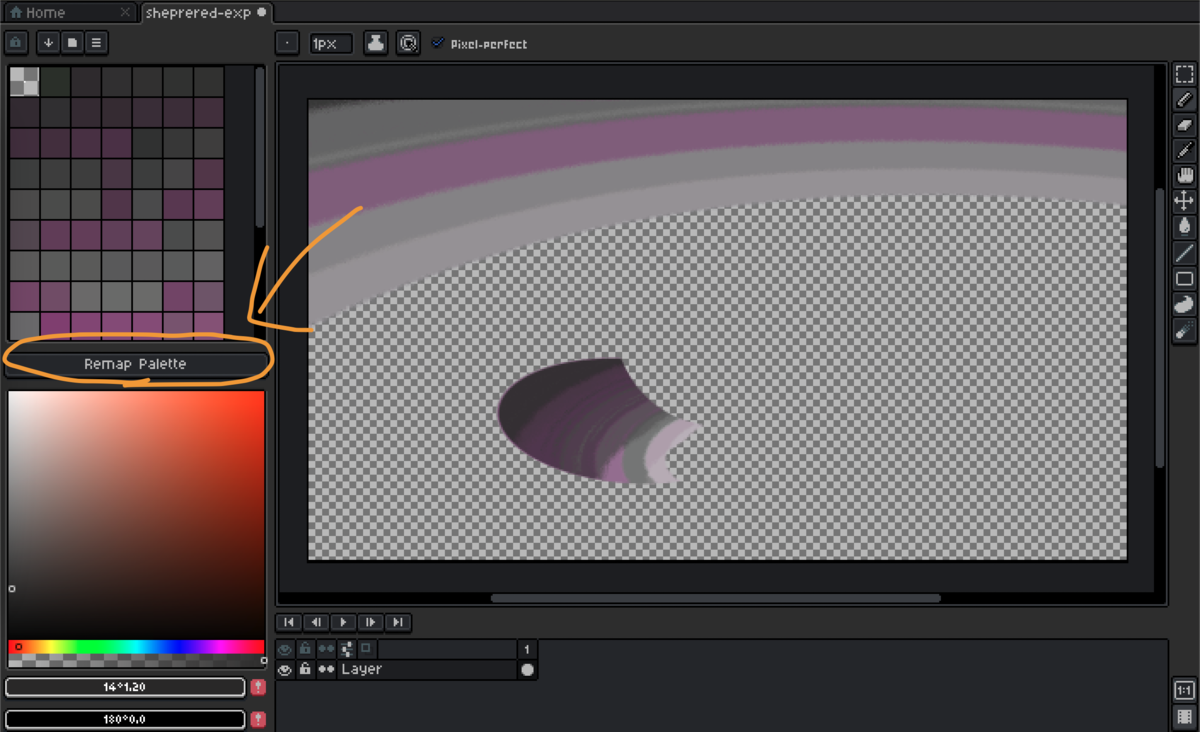
In the popup window, specify the number of colors you want to use.

Click "OK", and you'll temporarily see a strange result. Click the "Remap Palette" button at the bottom of the palette to apply the color changes.
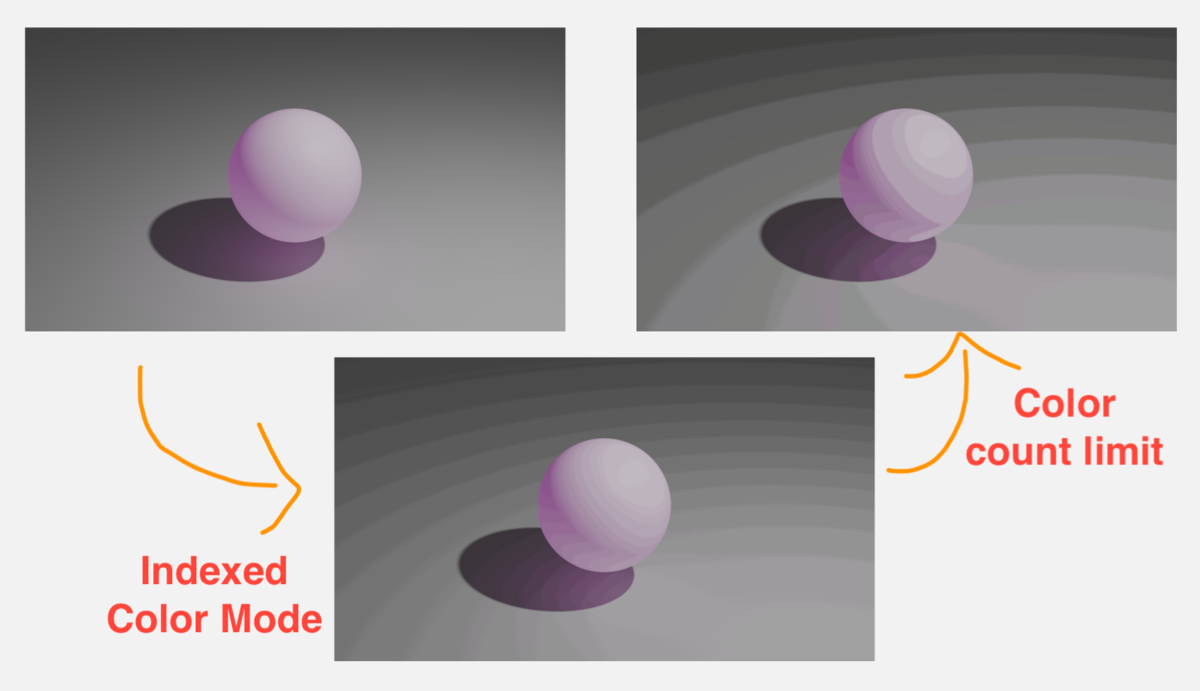
Here's a summary of the color reduction process so far:
Conclusion
This article explained how to reduce colors in Aseprite.
I think just reducing the colors of high-resolution images like photos is quite different from what we usually call pixel art, but couldn't they still be useful as reference material in some cases?
I hope this article helps someone.
[Related Posts]